Wednesday, 25 January 2012

My top 5 nail polishes

I am always on the look out for new nail polishes - some people are addicted to shoes - i'm addicted to Essie, OPI, Orly, Jessica etc. I love to hear about peoples 'must have' colours or warning me off a certain brand because it chipped within a day. Ooh yes. I am like the nail polish 'watch dog' I dig deep into brands to find out what they claim is actually true. The following 5 colours are ones that i always go back to if I need staying power and beautiful nails.

♥.) I stopped a woman in the street because I saw this colour. It's hard to put my love for 'Fiji' into words but i'll try. Essie describe it on the website as 'an opaque, creamy, pale pink'  Sounds pretty boring eh? WRONG. So wrong. This colour screams summer! Being honest you need pretty perfect nails for this one - square and well manicured. Downside? It is fairly streaky - you need to be very patinet with the colour and you need atleast 3 coats as it needs to be an opaque finish. Second downside is that it can be a nightmare to get hold of it (espcially out in the country where us folks live!) I did try Selfridges, Liberty's, John Lewis AND Harrod's and couldn't get my paws on it. In the end a lovely chemist at the top of Marble Arch called Bliss stocked practically every Essie colour you can find! Worth it? Hell yeah! It lasts on my nails for 7 days with zero chips (and an amazing top coat) You can imagine with a tan it looks so chic. Even typing this I'm craving it!

♥.) OPI 'Lincoln Park After Dark' just reminds me of my mum, nights out, lots of happy memories and of course NYC! You may have heard of this or even own it yourself. If not I demand go and buy it now! This is a really beautiful shade, its elegant, very flattering and easy to apply. OPI have always knocked our socks off with there ever expanding colour range and this is no exception. 'Where midnight meets purple' is how it is described on the OPI Lena White website and you can purchase it there for £10.50.  http://www.lenawhite.co.uk/store/home/lincoln-park-after-dark

♥.) Borjois 'Rose Lounge' was the colour famously sported By Kate Middleton at her wedding in April last year. As millions of people were glued to televions all over the world Borjois famously mentioned that this colour was what our lovely future queen was wearing! I love this as it's nice to think that Kate would be using a high street brand but also because this is my 'go to' polish if i want something really quick drying and natural. It's my 'I'm not wearing nail polish I just have perfect fingers' polish. You can purchase from any Boots or on the website at www.boots.co.uk

♥.) Barry M have been a huge hit with my friends and myself for well over a year now when it comes to nail polish. They do a great range of on trend colours, they are always affordable and boots occasionaly have brilliant offers on them. Sounds pretty too good to be true! The colour I was wearing all autmn was one of their newest shades - 'Black/Red' I had really gone off bright red - I think I have just over done it on the scarlet shade over the years. However this version has a lot of depth to it with some brown aswell. It just speaks 'quirky' to me. It doesn't look like another Barry M colour that half the nation has. In terms of staying power i would say it lasts for 5 days with no chips. After that it's all downhill from there. Definately one to purchase if your'e looking for something a little different and well - for £2.99 you can't go wrong! www.superdrug.co.uk  

♥.) This doesn't really count as a colour but it is absolutely beautiful to look at. China Glaze 'Fairy Dust' is Tazzi's statement polish. Fairy Dust is a clear laquer that has tiny specs of multicoloured glitter - so you can apply this over any colour and it will give a hint of sparkle without 'in your face glitter'. I am always borrowing her's and she gets so many compliment's on her nail polish when she wears it! You can purchase 'Fairy Dust' and lots of other colours in the China Glaze line at your local Sally's or online at www.sallys.co.uk

What are your 'go to' colours? We would both love to know!

Marni xoxox

Wednesday, 18 January 2012

'Ignorance isn't bliss'

I used to walk past this tinted moisturiser almost everyday. I went for years without knowing what it was or that it even existed until I heard some amazing reviews and I then (shamefully) went and bought it.


The truth is I always used to walk past all tinted moisturisers. They are just never right - always 'too greasy, too matte, too patchy' bla bla bla and the list goes on. So when I did hear about the Laura Mercier oil free tinted moitusirser I was a little sceptical. The price intianilly put me off - this tube will set you back £33 - I pay more for Chanel foundations but did I want to spend that much money on something as light as a tinted moisturiser?
Yes. It covers, it evens out, it keeps my combination skin oil free all day - but I still look fresh and 'glowy'. It doesn’t clog my pores and I love using it when I don't want to wear something as full coverage i.e. studio fix fluid, Chanel pro Lumiere *sobs* (RIP) etc. The only downfall is I wish it had a slightly higher sun protection - as I do still have to use my high SPF underneath it - obviously I am a little skincare obsessed but I can only assume as a tinted moisturiser a high majority of customers are buying this for there summer vacations so I think as such a luxurious brand that they would need to bring out a version with a higher SPF. This is a light-medium coverage and isn’t for you if you love a made up look. For me this is an understated quick fix where I can look like I have perfect skin without makeup. I did stop using it for a while because my skin was really bad during Christmas from alcohol/ unhealthy food and general late nights etc so if you are self conscious about how your skin looks I would probably not recommend it. However L-M do advertise it on the Space NK website as foundation for Acne skin so I think it is down to skin types and personal experiences.

For reference - I use the oil free version and wear shade 'Bisque' I apply this with a MAC #187 duo fibre face brush.
Marni xo

Tuesday, 17 January 2012

Step by step guide to extensions

Right ladies, here is your step by step guide to extensions. Some of you may know how to do it correctly but some girlies need a bit of help and direction, so that is where I come in!


Okay, firstly no-one wants to look fake and no-one wants people to know they've got them in so if you've got a bob or a short cut, go for 12 or 14 inches as this length isn't too long and it won't be obvious that you've got short hair underneath.


The trick is the amount you put in. The shorter the extensions are the thicker they look and feel. If you want to get long ones make sure you buy at least 2 packs! This is an important tip because if you don't put enough in you'll see where your hair ends and where the extensions start! Even if you have fine hair like me this rule still applies to you! If you've got shoulder length or fairly long hair, go for 16 or 18 inches.
Anything longer and you run the risk of looking a little fake. Okay, so I have run you through the length, now for the colour match.


First rule DON'T I repeat DON'T let the people in the shop tell you what colour to get, they are not qualified and don't always know what they're talking about. If you have a friend that is a hairdresser bring them but if not don't worry, here is what you should look out for.The colours usually go in number order i.e 1,2,4 black to dark to brown, 6,8 light brown and 10,12, are the blonde colours. However, depending on the make these numbers can change slightly. I use a colour 4 as this usually matches most brunettes unless you're very dark.


The only makes I recommend are Remy and Milkyway, these two are 100% real hair and the quality is much better than other brands I have tried. They last about 6 months before they start getting ratty.
Don't order the hair from the Internet if you've never bought them before, go into a Hairmasters (there's one in Luton) or a Sally's http://www.sallyexpress.com/ Once you know your colour and length then you can order from the net. Okay, so you know the basics how to choose your extensions - now you need to know how to put them in!


Firstly I will start by saying DO NOT USE GLUE! (unless you want to be bald) this is just a massive no no. I am ashamed to say I have used glue before and it's not pretty. The hair bonding glue smells like fish and makes your hair smell like it too, it's sticky and feels disgusting. If you glue them in you'll notice one wash and all the extensions will be hanging out leaving you with all that beautiful glue stuck on your scalp and roots. To get the glue out, using conditioner and a comb is the only way and as I said before half your hair will comb out with it!


DO NOT GET INDIVIDUAL BONDED EXTENSIONS!
These will fall out one by one and take your natural hair with it! I have had bonded extensions before and they cost me £400.00! It's honestly a waste of money and it's alot of upkeep. I recommend clipping in your own extensions with individual clips, it's the best way as you can clip them in when you want and take them out when you want! It's easy to style them as as well. You can curl them or straighten them before you clip them in for instant glam! They only pull if you don't put them in correctly - if you have fine hair, back comb your roots then put them in and you'll find they sit very comfortably.
Here's how to put them in...


So get your pack of extensions, they will come in a long weft that you have to cut according to the width of your head. Start at the bottom of your hair, section as if your going to straighten it. Measure the weft up to that section and cut accordingly. You end up with a weft that looks like this...


Then carry on that process leaving about an inch gap between each section that you do. Don't do them all the way to the top of your head as you'll see them, so I would stop around the temple area. Make sure when you get nearer the top you do all the way around the head. You need the extensions around the front or this could leave a tell tale sign that you've got extensions in... Shhhhh


Then, after you've got all of your wefts, keep them in order so you know where to put them. You'll need to buy the medium size extension clips and you'll need to put one at each end and possibly one in the middle. You'll need about 12-14 clips maybe more maybe less, depending on how many wefts you put in. Now here's the fun part (not!) you'll need to sew the clips on to the extensions. It's fairly easy, just time consuming. You can buy wefts with the clips already sewn on to take away the stress of doing it yourself but these are a lot more expensive! This is what they should look like...


A little tip - If you don't want a lot of wefts in your hair, you can double them up i.e., sewing 2 wefts together. This is what I do, it allows you to put more in so you can have super thick luscious locks! I would recommend you style your hair first and then put your extensions in. This looks a lot better and its a lot easier than trying not to pull on them whilst they're in!


It's also a good idea to buy an extension brush as this prevents breakage. I recommend the Denman extension brush. It works a treat and carefully gets all of the tangles out - it's kind on natural hair too. Definitely a 5**** brush!


Now you're ready girls so get clipping them in and looking glam!


I hope this was helpful!


Love always,


Tazzi xoxo


Monday, 16 January 2012

The Yankee Candle

This post is going to be short and sweet. Unfortunately rather like my Yankee Candle. I am a quarter (and a bit) of a way through 'Christmas Cookie' and I can't get enough. After seeing beauty bloggers talking about it constantly on twitter I had to check it out for myself. I must have tried four different Clinton Card stores and none of them had them - Clinton card UK MD who follows me on twitter take note. I also tried lots of garden centres around my area who stock Yankee Candle my boyfriend even went as far and tried an actual Yankee Candle shop and yes you guessed it...DIDN'T have it. Well it was driving me MAD and if you can't get hold of a product it just makes you want it more right?! Finally, House of Fraser in Bluewater had one left in stock and I received a rather lovely early Christmas present from the boyfriend *yay!*


The candle itself is the biggest size Yankee make but also do two other smaller sizes. It is a sweet but spicy scent (the name really gives it away) But not too sickly at the same time. I'm really impressed with the burning time and am looking forward to trying other scents in the Yankee range. As it was a gift I’m not sure on how much it was but looking at different websites I think it was between £13-£19.


I will be heartbroken when it runs out but I will 100% be re purchasing this (through Amazon this time) and plan on burning Yankee's all year round - even if it is a Christmas candle!! Pretty random post I know, but if you are a candle freak like myself I’m hoping you will appreciate the candle love!


Until next time..


Marni xo


Prep + Prime love

This product is something I have been religiously using every day for a few months now. It's so good I’m surprised I don't have a shrine of it in my room. It's one of those special pieces of makeup that pops up once in a blue moon and has you hooked from the word go.


Can I get a drum roll please...


MAC Prep+Prime transparent (pressed) finishing powder is what I’m talking about!


It all started on a night out, stumbling to the ladies and seeing in horror how oily I looked- Now my skin is normal/combination so without powder I do look abit like Millie from Made in Chelsea - however beautiful she is whenever I watch her on the show I find myself silently screaming to the television PUT SOME POWDER ON!!! I don't like to look completely matte - this makes you look flat and dull, I like something of the in-between and was struggling to find a compact powder that would banish oil forever!! (Well a day at least)


Then a miracle happened and MAC bought out a pressed version of their Prep+Prime finishing powder. You're probably thinking 'why didn't you just use the loose one?' I do! For whenever I do freelance jobs it's the only powder I will use. But really? Do YOU want to carry round loose powders in your bag and live in fear it will brake open and spill everywhere? No.


Here's what MAC have to say about it. 'A silky, colourless finishing powder suitable for all skin tones. Reduces shine while optically minimizing the look of lines & imperfections'.


Whenever I get it out of my makeup bag people look in horror and say 'why are you putting white powder on your face??!!!' It's not white when it goes on and is blended correctly but it is perfect as it doesn’t add any unwanted colour to my face, especially if I have applied contour or blush. It doesn't move my makeup or go patchy. It's love!


You can purchase this at www.maccosmetics.co.uk or at any MAC store or concession!


I would definitely recommend you try this if you have oily/combination skin, I stay oil-free all day and sometimes don't even have to touch it up!


Blog soon!


Marni xo

Thursday, 12 January 2012

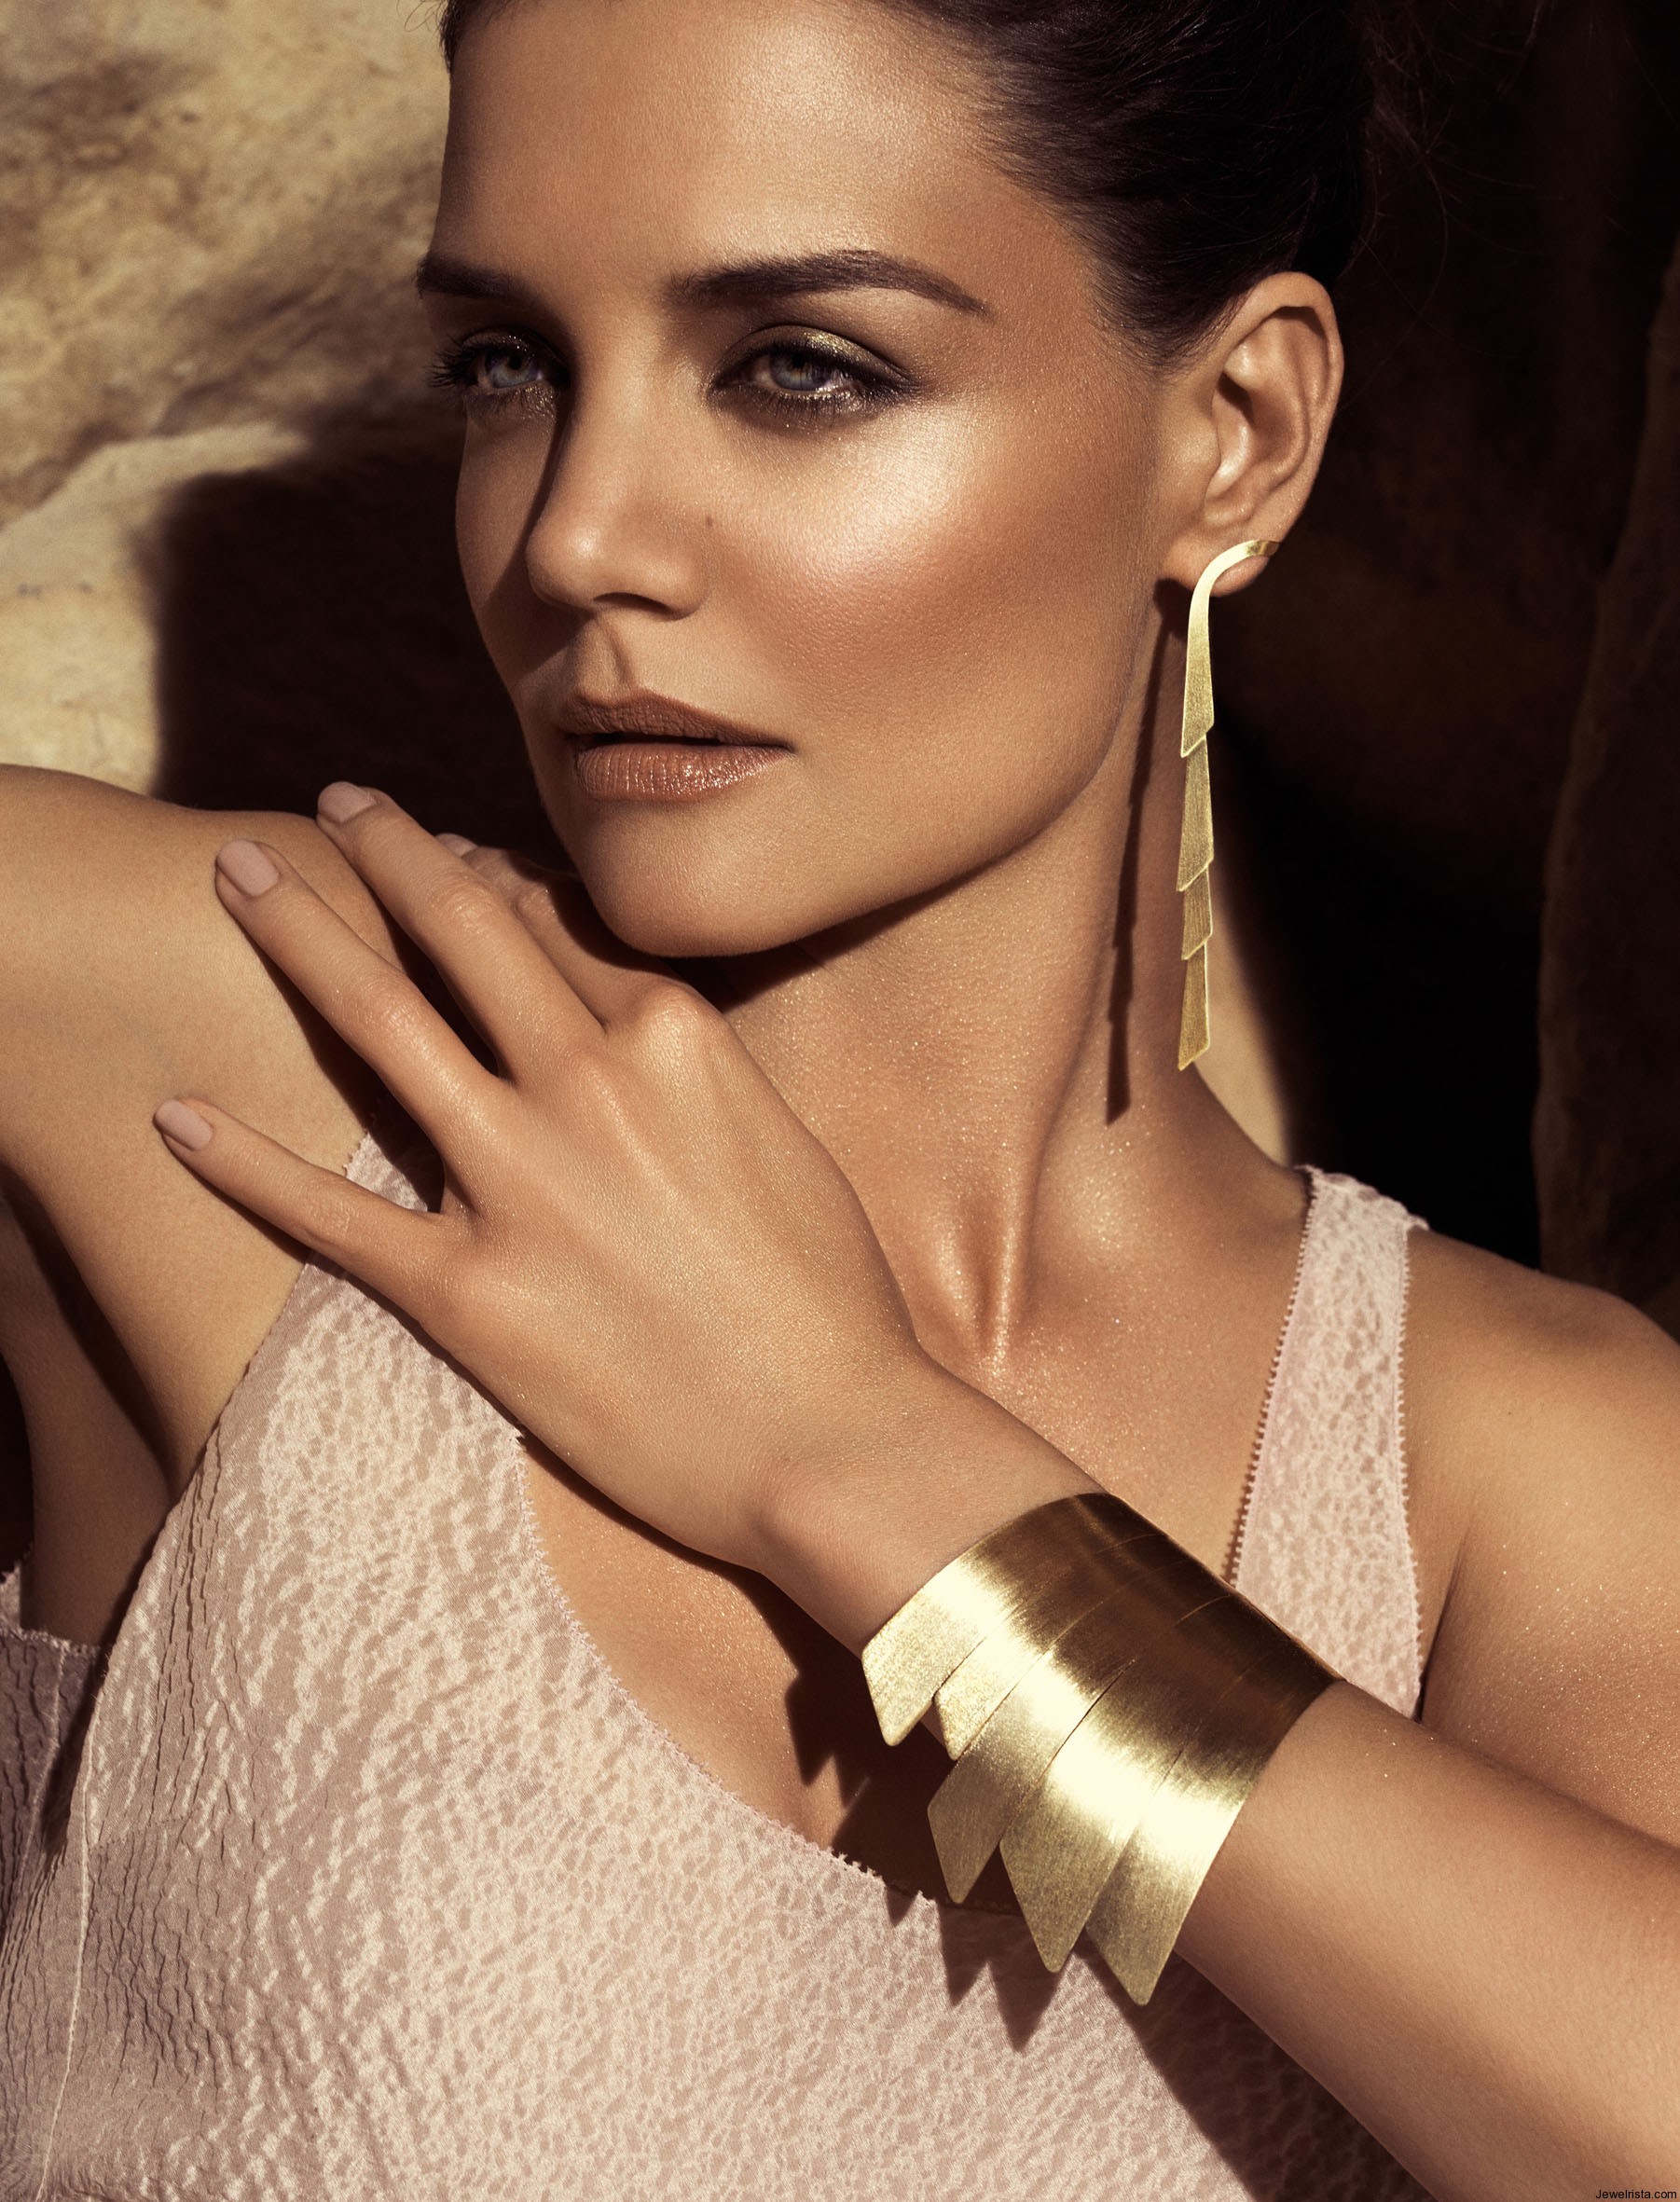
SPRING/SUMMER TRENDS 2012

It's that time of year again... How it comes around so soon - our twitter and Facebook news feeds get jammed up with designers and fashionista's bragging about being front row at the Lanvin show and what they received in there cannon goody bag. If all this trend and fashion talk confuses you just as much as it used to confuse me don't worry because this post will leave you knowning how you should be wearing your makeup for the next few months...


Lips- Remember last summer neon pinks and brighter colours where sporting many a pout?! This year it's all about a toned down version of those neon colours. - if the brighter shade isnt for you nude and pastel colours have made a come back!


Brows - Donna Karen and Derek Lam both set beautiful examples of how brows should be this ss/12 it's all about brows again this year so ladies keep them in tip top condition!!


Skin - Luminous faces with warm hues and just a hint of colour is how it's done - get booking those facials in if you want to look like a Victoria's secret model! Bronzer is also big but only in specific places. Gone are the days of whacking it all over. Think contour, contour, contour!


Eyes - Shades of green, lavender, soft baby blue's and silver are the pastel colours that will be lined on the lid. Bronzed smokey eyes are making a comeback and for those glitter addicts out there you will be pleased to know lighter shades of metallic and glitter e/s are very much on trend!


For more inspiration..


How smoking hot does Katie Holmes look for the new H Stern campaign?


Do you have a favourite look from the trends above?! I know I'll certainly be digging out my pastel nail polishes I.e Essie mint candy apple!


Have a great day!
Love,


Marni xo

Tuesday, 10 January 2012

Say Goodbye To Greasy!!!

Wow, wow, wow! This product by far is one of the best hair care products on the market.
Not only does it enable you to leave your locks for another day without a hair wash but it cleverly hides its self by the tiny bit of colour thats added to it.
Batiste is a dry shampoo, if you have fine hair that gets greasy quickly this is ideal for you. It adds texture and actually adds volume to your hair at the same time!
If you fall asleep after work and forget to wash your hair (we've all done it) this product will effortlessly refresh your roots making it look like its just been washed before your late for work the next day, its magic! Most girls are a bit scared to use this product especially brunettes, but do not fear there are 3 dry shampoos with a hint of colour for those light brunettes, dark brunettes and of course not forgetting the blondies!
If your a blonde the blonde dry shampoo can also help to hide dark roots in my experience as it comes out quite a light colour.


I would recommend this products for ladies on the go and also for ladies with dry hair that don't necessarily want to wash it too often as this can dry out ends!
If you wash your hair too often the glands in your scalp that produce grease will be stimulated, therefore creating more grease! So this product can actually stop your hair from getting greasy- Amazing!


It retails for £3.99 for a 200ml and £1.52 for the travel size at 50mls which is very reasonably priced considered the job it does. You can buy this amazing product in boots, superdrug, wilkinsons and many other stores!


Best buy for 2012 <3 this product!
Love,
Tazzi xoxo